All in all, it is pretty straightforward. Download, install, download, install. But if you’ve never installed a Linux based system before, some of the steps will look quite foreign. Plenty of screenshots will help with that!
Before you start u have to download the following:
1.Virtual Box
2.Android x86 iso


Before you start u have to download the following:
1.Virtual Box
2.Android x86 iso
step1 : Install Virtual Box
No need to tell how to install an exe format file on windows.
step2: Get Android x-86 ISO
Next up, you’ll need the Android-x86 ISO itself. The one to snag is android-x86-2.2-generic.iso as i found out this is the one that works for me.
Google Code: http://code.google.com/p/android-x86/downloads/list
Google Code: http://code.google.com/p/android-x86/downloads/list
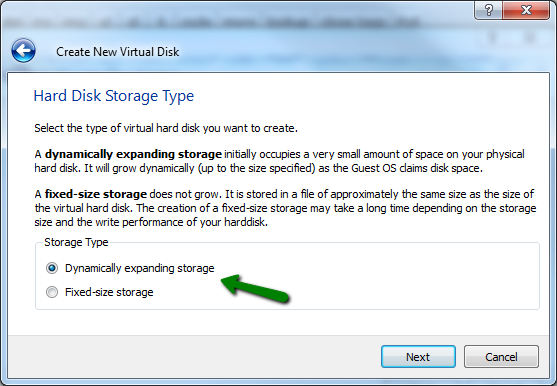
step3:Creating the Virtual Machine
Follow the pictures and create a new virtual machine named Android 2.2 Froyo

set the memory(the RAM) size according to your requirement(ur target system)


step4 :Mount ISO
Now you have to choose the iso image that you have downloaded and it' done follow the next step.

step5 :Boot it Up
You’re now ready to boot the new VM. Double click on it and the VM will start running.
The important thing to remember is that if you need to break out of the VM to control the rest of your system again, hit the right hand Ctrl key (at least on Windows) and the VM will release control back to the host OS.
If your goal is simply to boot the Live CD, select the “Live CD – VESA mode” option and u r done.

At that point, it should boot up and be ready to use—almost!!. Well you’ll probably notice that you won’t see your mouse cursor showing up at all. From the “Machine” menu, select “Disable Mouse Integration”. Then click inside the VM, you’ll get another dialog about capturing the mouse pointer. Hit “Capture” and you’re ready to go—just remember that the right hand Ctrl key releases control back to your host OS. Since you’re not installing to a VHD, you’re done. Enjoy Android-x86!
step6 :Installing Android x-86 to VHD
So everything is set up and ready to run, but there are a few steps left if you want to install Android-x86 to a virtual hard drive. From the boot menu select “Installation – Install Android-x86 to harddisk”. A bunch of text will fly by and you’ll get the following menu:

- Select the “Create/Modify partitions” option and you’ll then be presented with the cfdisk partition editor.
- From here select “New”, then “Primary” and then it will ask for size , keep it as it is.<<><>

- Next select “Bootable” and then “Write”. It will ask you to type out the word “yes”—do so.
- You’ll get a “Writing partition table to disk…” message and should now have an “sda1″ entry in the table, like so:

Now you’ll want to select the “Quit” option to jump back to the installation procedure. You should now have an entry there which says “sda1 Linux VBOX HARDDISK”. Select that entry to continue.

Select ext3 from the list and continue with the formatting.

Once it is done formatting, you’ll be asked to install the GRUB bootloader. This is important, so don’t skip it, otherwise your freshly installed VHD won’t boot!

Now you’ll be asked whether or not you want “/system” to be read-write. Unless you’re a developer, just select “No”. Another progress bar will show you the progress of the actual installation. Almost done!

Android-x86 is now installed on your VHD! You can now run the OS or create fake SD card.
Since the ISO is still mounted, the VM will boot off it again after a reboot. From the “Machine” menu, “Close” the VM, go back into the VM settings and unmount the ISO following the same instructions from step 4, but select “Remove disk from virtual drive”. Then it will boot off the freshly installed VHD instead


and hence you r done with installation.!!!!
/******* In the next update i will be working on a small working media player along with how to develop a file dialog for choosing media files ********/
Gr8!!!....Keep posting buddy, waiting for the next 1 :)
ReplyDeletefinally got sometime and did some work for the next post....blog will updated very soon
ReplyDeleteThanks a lot for the info.. Had been searching for the same for quite sometime.... Keep up the great work!!!
ReplyDeleteThis comment has been removed by the author.
ReplyDeleteDownload this Android vs. if you want to have an ethernet port for the virtual machine which you can configure to access internet
ReplyDeletepress [alt]+[f1] for commandline mode
and execute these commands
ifconfig eth0 192.168.0.4 netmask 255.255.255.0
route add default gw 192.168.1.1 dev eth0
setprop net.eth0.dns1 127.54.225.228
get these info using {ipconfig /all (on wins)} or {ifconfig (linux)}
n u r done!!
http://code.google.com/p/android-x86/downloads/detail?name=android-x86-3.2-RC2-eeepc.iso